Most people take the respiratory system for granted. People with certain medical conditions may experience breathing problems that they experience regularly. Difficulty breathing almost always requires emergency medical attention. The exception is feeling weak from normal activities such as exercise. It also happens that a person may not know about his hidden diseases. A sudden attack and cessation of breathing can complicate the situation. The victim will be very frightened and will not be able to quickly orient himself to help himself. In any case, you need to know what the first steps are, because even if this happens to a person often, it is unknown whether everything will go away on its own this time.
What is respiratory arrest?
People breathe by inhaling fresh air into their lungs, replenishing some of the oxygen in them, displacing unnecessary carbon dioxide and exhaling waste air. Blood vessels located in the lungs distribute oxygen to all cells of the body. Typically, people have a lung capacity of 4 to 6 liters. When someone stops breathing, it is a life-threatening condition known as respiratory arrest. It is only acceptable for a few minutes; if it lasts longer, vital organs begin to fail.
Sometimes, when a person stops breathing, the breathing process can resume if it is stimulated by a rescuer blowing air into the lungs. However, the victim's condition may worsen. It is likely that with difficulty breathing, a spasm of the heart may occur with a further stop in its work. Without lungs receiving oxygen, the victim will suffer brain damage in just a few minutes. Because of this, it is extremely important that rescuers quickly and correctly resuscitate the victim and ventilate the lungs.
Indirect cardiac massage
NMS is the basis of resuscitation measures. It is its implementation that ensures the minimum necessary blood supply to the brain and heart, so it is very important to know what actions are performed during indirect cardiac massage.
Carrying out NMS should begin immediately after identifying the victim as lacking consciousness and normal breathing. For this:
- Place the heel of the palm of your right hand (for left-handers, the left hand) on the center of the victim’s chest. It should lie exactly on the sternum, slightly below its middle.
- Place your second palm on top of the first, then interlace their fingers. No part of your hand should touch the victim's ribs, as this increases the risk of fracture when performing NMS. The base of the lower palm should lie strictly on the sternum.
- Position your torso so that your arms rise above the victim’s chest perpendicularly and are extended at the elbow joints.
- Using your body weight (not arm strength), bend the victim's chest to a depth of 5-6 cm, then allow it to restore its original shape, that is, fully straighten, without removing your palm from the sternum.
- The frequency of such compressions is 100–120 per minute.
Current recommendations for CPR allow only NMS.
Performing NMS is hard physical work. It has been proven that after about 2–3 minutes, the quality of its performance by one person decreases significantly. It is therefore recommended that, if possible, people providing assistance change each other every 2 minutes.
Algorithm for indirect cardiac massage
Errors when performing NMS
- Delay in the start of the event. For a person in a state of clinical death, every second of delay in starting CPR can result in a lower chance of resumption of spontaneous circulation and a worsening neurological prognosis.
- Long breaks during NMS. It is allowed to interrupt compression for no longer than 10 seconds. This is done for ID, changing caregivers, or when using a defibrillator.
- Insufficient or too great compression depth. In the first case, the maximum possible blood flow will not be achieved, and in the second, the risk of traumatic injuries to the chest increases.
First aid for respiratory arrest
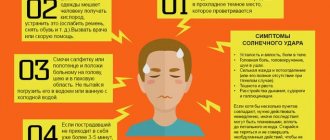
First of all, you need to know the exact symptoms that indicate a stoppage of the respiratory process. A person who has difficulty breathing is often in poor health. Naturally, if he lost consciousness and fell, then something is clearly wrong with him, but there are still several symptoms that are warning signs. A timely response to them will help prevent suffocation from reaching the extreme. The main symptoms before respiratory arrest may include:
- fast breathing;
- it is impossible to breathe while lying down or you only need to sit down to breathe;
- a very anxious and excited feeling inside;
- tired, exhausted look;
- dizziness;
- pain;
- fever;
- cough;
- nausea;
- vomit;
- bluish lips, fingers and nails;
- breasts move in an unusual way;
- muffled voice or difficulty speaking;
- coughing up blood;
- fast or irregular heartbeat;
- profuse sweating;
- there may be a rash or swelling of the face, tongue, or throat.
If the person cannot breathe, call 911 immediately. Rescue actions must then be carried out. Check your airway and pulse. Before you begin, loosen any tight clothing. Help the person use the prescribed medication (asthma inhaler or home oxygen). Continue to monitor the person's breathing and pulse until medical help arrives. If the patient loses consciousness and stops breathing completely, begin artificial respiration. Proper artificial respiration is carried out in several steps. First, make sure the airway is clear. Next, pinch the victim's nose with two fingers. Take a breath and press your lips tightly against the lifeless person. Release the air. The victim's chest should rise at this moment and then fall again. The procedure must be carried out up to 30 times. After this, the person must regain consciousness.
Don't assume that a person's condition has completely improved just because you no longer hear abnormal sounds such as wheezing. If you find open wounds on the victim's neck or sternum, they should be closed immediately, especially if air bubbles appear in the wound. Rewind them right away. A deep chest wound allows air to enter a person's chest cavity with each breath, which can lead to lung collapse. Cover the wound with a plastic bag or gauze covered with Vaseline, covering it except for one corner. This will allow trapped air to escape from the sternum, but the bandage will prevent air from entering the sternum through the wound.
Inexperienced rescuers can harm the victim with their attempts to help, so you need to know what you should absolutely not do. Do not give food or drink to the person. You should not move a person if there is an injury to the sternum or airway, as this will only worsen the blood flow and open the wound. Many inexperienced rescuers try to place the victim's head on something soft. Doing this is strictly prohibited. Do not use a pillow under your head - this may block your airway. Wait until the person's condition improves before getting medical help.
Symptoms
The fact that the victim has suffered cardiac arrest will be indicated by 5 main symptoms. They include:
- Loss of consciousness. The victim stops responding to sounds and stimuli;
- No pulse. They check it through the carotid artery. To do this, the index and middle fingers are applied to the neck at a distance of 2.5-3 cm from the thyroid cartilage. This is a very serious sign;
- Stopping breathing. Determined by the absence of characteristic movements of the chest;
- Dilated pupils. It is necessary to lift the upper eyelid and shine a flashlight into the eyes. If the pupils are very dilated and do not react to light at all, this is an alarming sign;
- The skin acquires a bluish or pale gray tint. This is primarily typical for the facial area.
In some cases, another sign may be the appearance of body cramps. All these symptoms are very important, and if they are present, it is necessary to begin providing first aid.
Causes of respiratory arrest
There are many different causes of breathing problems. Common causes include certain health conditions and sudden medical emergencies.
Breathing problems can be caused by:
- anemia (low red blood cell count);
- suffocation;
- chronic obstructive pulmonary disease (COPD), emphysema or chronic bronchitis;
- heart failure;
- lung cancer or cancer that has spread to the lungs;
- respiratory infections, including pneumonia, acute bronchitis, whooping cough and others;
- pericardial effusion (fluid surrounding the heart and preventing it from functioning properly);
- pleural effusion (fluid surrounding the lungs and compressing them);
- blood clot in the lungs (thromboembolism);
- collapsed lung (pneumothorax);
- myocardial infarction;
- injury to the neck, chest wall or lungs;
- severe allergic reaction;
- drowning, in which fluid accumulates in the lungs.
Artificial respiration from mouth to mouth
If a poisoned person has secretions in the mouth that are dangerous for the resuscitator, such as poison, poisonous gas from the lungs, or an infection, then artificial respiration is not necessary! In this case, you need to limit yourself to performing an indirect cardiac massage, during which, due to pressure on the sternum, about 500 ml of air is expelled and again absorbed.
How to do mouth-to-mouth artificial respiration?
- The victim should be placed in a horizontal position with his head thrown back. You can place a cushion or hand under your neck. If there is a suspicion of a fracture of the cervical spine, then you should not throw your head back.
- The lower jaw needs to be pushed forward and downward. Free your mouth from saliva and vomit.
- Holding the injured person’s open jaw with one hand, with the other you need to tightly pinch his nose, inhale deeply and exhale as much as possible into his mouth.
- The frequency of air injections per minute during artificial respiration is 10–12.
For your own safety, it is recommended that artificial respiration is best done through a napkin, while controlling the tightness of the pressure and preventing air “leakage”. Exhalation should not be sharp. Only strong but smooth (for 1–1.5 seconds) exhalation will ensure proper movement of the diaphragm and filling of the lungs with air.
Symptoms of the disease
You should know what symptoms a person has when breathing stops in order to begin providing first aid.
- immobility of the chest and abdomen;
- bluishness of the facial skin;
- unconsciousness of the victim;
- absence of sound of inhalation and exhalation.
When do methods of human resuscitation begin?
Before urgently using artificial respiration and chest compressions, it is necessary to accurately determine that the victim is experiencing one of the stages of clinical death. It is often difficult for an untrained person to determine pulsation in the carotid artery. The victim is carefully examined to identify other symptoms of cardiac arrest. If he does not respond to stimuli due to unconsciousness, and his breathing is convulsive or undetectable, then the diagnosis is confirmed.
Determining pulsation in the carotid artery is difficult for an untrained person.
In the event of a possible sudden stop in breathing, before performing mechanical ventilation, it is necessary to perform actions that will help in further resuscitation measures.
- Once a person is clinically dead, it is necessary to exclude further dangerous conditions for him. In case of drowning, they take him to shore or stop the bleeding if there was a serious injury. The body is moved to a calmer place, if its condition allows this, and there are no numerous fractures.
- It is necessary to contact the victim to check his consciousness. If he responds or shows the slightest signs of life, then he does not need methods of artificial respiration and cardiac massage. The rescuer immediately calls an ambulance in any condition of the person.
If there are signs of life, you should immediately call doctors. - If there is no reaction to the treatment, the body is turned over and the air passages are opened. The neck is extended and the upper jaw is brought forward. The victim's breathing must be assessed. Sometimes convulsive gasps during agony are mistaken for the ability to breathe. They are irregular, convulsive, and defined superficially.
- If the patient has weak but normal breathing, he is turned on his side. With some injuries, breathing stops over time, so it needs to be monitored.
If the patient has weak but normal breathing, he is turned on his side.
Preparing for artificial respiration
Before performing expiratory artificial respiration, the patient should be examined. Such resuscitation measures are contraindicated for facial injuries, tuberculosis, poliomelitis and trichlorethylene poisoning. In the first case, the reason is obvious, and in the last three, performing expiratory artificial respiration puts the person performing resuscitation at risk.
Before starting expiratory artificial respiration, the victim is quickly freed from clothing squeezing the throat and chest. The collar is unbuttoned, the tie is undone, and the trouser belt can be unfastened. The victim is placed supine on his back on a horizontal surface. The head is tilted back as much as possible, the palm of one hand is placed under the back of the head, and the other palm is pressed on the forehead until the chin is in line with the neck. This condition is necessary for successful resuscitation, since with this position of the head the mouth opens and the tongue moves away from the entrance to the larynx, as a result of which air begins to flow freely into the lungs. In order for the head to remain in this position, a cushion of folded clothing is placed under the shoulder blades.
After this, it is necessary to examine the victim’s oral cavity with your fingers, remove blood, mucus, dirt and any foreign objects.
It is the hygienic aspect of performing expiratory artificial respiration that is the most delicate, since the rescuer will have to touch the victim’s skin with his lips. You can use the following technique: make a small hole in the middle of a handkerchief or gauze. Its diameter should be two to three centimeters. The fabric is placed with a hole on the victim’s mouth or nose, depending on which method of artificial respiration will be used. Thus, air will be blown through the hole in the fabric.
Hardware artificial respiration methods
For the first time, hardware methods of artificial respiration began to be used back in the eighteenth century. Even then, the first air ducts and masks appeared. In particular, doctors proposed using fireplace bellows to blow air into the lungs, as well as devices created in their likeness.
The first automatic ID machines appeared at the end of the nineteenth century. At the beginning of the twenties, several types of respirators appeared at once, which created intermittent vacuum and positive pressure either around the entire body, or only around the patient’s chest and abdomen. Gradually, respirators of this type were replaced by air-injection respirators, which had less solid dimensions and did not impede access to the patient’s body, allowing medical procedures to be performed.
Best materials of the month
- Why you can't go on a diet on your own
- 21 tips on how to avoid buying stale food
- How to keep vegetables and fruits fresh: simple tricks
- How to curb your sweet cravings: 7 unexpected products
- Scientists say youth can be extended
All ID devices existing today are divided into external and internal. External devices create negative pressure either around the patient's entire body or around his chest, thereby inhaling. Exhalation in this case is passive - the chest simply collapses due to its elasticity. It can also be active if the device creates a positive pressure zone.
With the internal method of artificial ventilation, the device is connected through a mask or intubator to the respiratory tract, and inhalation is carried out by creating positive pressure in the device. Devices of this type are divided into portable, intended for work in “field” conditions, and stationary, the purpose of which is long-term artificial respiration. The former are usually manual, while the latter operate automatically, driven by a motor.
Manual methods of artificial respiration
There are also so-called manual methods of artificial respiration. They are based on changing the volume of the chest due to the application of external force. Let's look at the main ones.
Sylvester's method
This method is most widely used. The victim is placed on his back. A cushion should be placed under the lower part of the chest so that the shoulder blades and the back of the head are lower than the costal arches. In the event that artificial respiration is performed using this method by two people, they kneel on either side of the victim so as to be positioned at the level of his chest. Each of them holds the victim’s hand in the middle of the shoulder with one hand, and with the other just above the level of the hand. Next, they begin to rhythmically raise the victim’s arms, stretching them behind his head. As a result, the chest expands, which corresponds to inhalation. After two or three seconds, the victim’s hands are pressed to the chest, while squeezing it. This performs the functions of exhalation.
In this case, the main thing is that the movements of the hands are as rhythmic as possible. Experts recommend that those performing artificial respiration use their own rhythm of inhalation and exhalation as a “metronome”. In total, you should do about sixteen movements per minute.
ID using the Sylvester method can be performed by one person. He needs to kneel behind the victim’s head, grab his arms above the hands and perform the movements described above.
For broken arms and ribs, this method is contraindicated.
Schaeffer method
If the victim's arms are injured, the Schaeffer method can be used to perform artificial respiration. This technique is also often used for the rehabilitation of people injured while on the water. The victim is placed prone, with his head turned to the side. The one who performs artificial respiration kneels, and the victim’s body should be located between his legs. Hands should be placed on the lower part of the chest so that the thumbs lie along the spine and the rest rest on the ribs. When exhaling, you should lean forward, thus compressing the chest, and while inhaling, straighten, stopping the pressure. The elbows are not bent.
Please note that this method is contraindicated for fractured ribs.
Laborde method
The Laborde method is complementary to the Sylvester and Schaeffer methods. The victim's tongue is grabbed and rhythmically stretched, imitating breathing movements. As a rule, this method is used when breathing has just stopped. The resistance of the tongue that appears is evidence that the person’s breathing is being restored.
Kallistov method
This simple and effective method provides excellent ventilation. The victim is placed prone, face down. A towel is placed on the back in the area of the shoulder blades, and its ends are passed forward, threaded under the armpits. The person providing assistance should take the towel by the ends and lift the victim’s torso seven to ten centimeters from the ground. As a result, the chest expands and the ribs rise. This corresponds to inhalation. When the torso is lowered, it simulates exhalation. Instead of a towel, you can use any belt, scarf, etc.
Howard's method
The victim is positioned supine. A cushion is placed under his back. Hands are moved behind the head and extended. The head itself is turned to the side, the tongue is extended and secured. The one who performs artificial respiration sits astride the victim’s thigh area and places his palms on the lower part of the chest. With your fingers spread, you should grab as many ribs as possible. When the chest is compressed, it simulates inhalation; when the pressure is released, it simulates exhalation. You should do twelve to sixteen movements per minute.
Frank Eve's method
This method requires a stretcher. They are installed in the middle on a transverse stand, the height of which should be half the length of the stretcher. The victim is placed prone on the stretcher, the face is turned to the side, and the arms are placed along the body. The person is tied to the stretcher at the level of the buttocks or thighs. When lowering the head end of the stretcher, inhale; when it goes up, exhale. Maximum breathing volume is achieved when the victim's body is tilted at an angle of 50 degrees.
Nielsen method
The victim is placed face down. His arms are bent at the elbows and crossed, after which they are placed palms down under the forehead. The rescuer kneels at the victim’s head. He places his hands on the victim’s shoulder blades and, without bending them at the elbows, presses with his palms. This is how exhalation occurs. To inhale, the rescuer takes the victim’s shoulders at the elbows and straightens, lifting and pulling the victim towards himself.